Thursday, 16 August 2012

Cath Kidston Inspired Floral and Polka Dot Nails

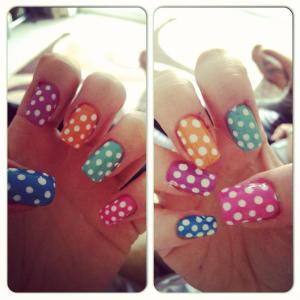
Cath Kidston has become massively popular over the last few months with her vintage looking florals and patterns. It was only a matter of time before someone moved these designs to nails. So this post is my attempt at a floral pattern on two fingers, and polka dot on the rest.


The colours used in this design are (from L to R) Bourjois Beige Glamour, Miss Sporty Red, Models Own Jade Stone, Nina Ultra Pro Manicure White and E.L.F Black. 

Firstly, I started with two coats of Models Own Jade Stone. I love this colour so much, I can't put my finger on it because I'm more of a bright pink kinda girl, but there's just something about it! I then used Bourjois Beige Glamour on my ring finger and thumb. I had a small amount of polish the brush and roughly dotted between 4 and 5 'blobs' on the nail, all spread out. I then used my dotting tool with a small amount of Miss Sporty Red on the end, and used this to outline either side of each dot. The beauty of this design is it doesn't need to be done neatly! I then needed to add leaves. Because I don't have a darker green polish, I used two parts of Models Own Jade Stone mixed with one part of E.L.F Black. Then, using my dotting tool again, I just blobbed two stretched dots either side.


Now you could continue this on all nails if you'd like but as it's quite a bold print, I chose to do 2 nails and rest in polka dots. 


Using your dotting tool and white polish, make a series of dots over the remaining nails. These can be as perfect or random as you like! Et voila, done! :)


I absolutely love this design. It stands out, looks girly and has had lots of comments already! 


To finish the design, I applied one coat of 'Out of Door' top coat not only protect the pattern, but to give it a nice glossy finish.

xoxo


Wednesday, 15 August 2012

Oh Hey There Giraffe

I'd seen someone that had done this before but couldn't for the life of me remember where!

It's quite a fiddly design and takes a steady hand but looks awesome when it's done!


Colours used were Barry M Cyan Blue, Rimmel Sunshine mixed with French White, Bourjois Beige Glamour and Maybelline Black. 

If I'm completely honest, I was in such a flap because my nails just weren't going right. This was about the 5th design I'd tried. So at the time, I didn't think it looked that good, but now I wish I'd got more photos (and better ones!!!) so I think this is a design I'll revisit. 

What other animals would work well on nails?!

Saturday, 11 August 2012

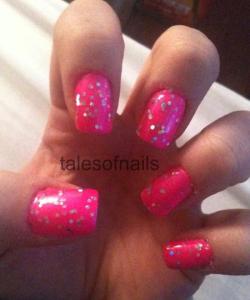
Pretty in Pink with Glitter Gradient


I have a load of new polishes which I've had for ages but never actually used so I've made it my mission to change that!

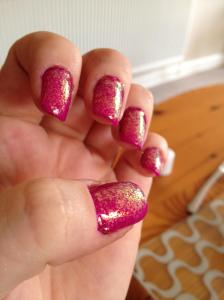
Today's nails are created using Rimmel Fancy Fuschia, Barry M Silver Glitter Limited Edition and Barry M Hologram 118.


I started off with a single coat of Fancy Fuschia before applying a second, thicker coat. I love Rimmel nail polishes because not only are the brushes nice and far and cover all the nail, but they always seem to dry with a nice smooth finish!


Once the second coat had dried, I then used Barry M Silver Glitter around the bottom of my nails, going about half way up. I wanted this to look like sprinkled glitter so tried not to make it even or matching on each nail. I then used a cocktail stick on with the Barry M Hologram 118 and picked out individual gems to scatter over the glitter to give it a bit more 'oomph!'


I then sealed it with a top coat out 'Out the Door' which is the best top coat I have ever, ever, EVER used!

I love this design. I feel all magical and princess like! Amazing how a simple design can work so well, ey?!


Nail Heaven

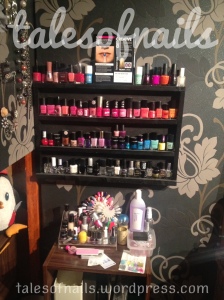
It was only a matter of time before my nail polish collection grew out of it's shelf home. Luckily, my Dad is D.I.Y man of the century so he made me an amazing nail polish stand! I originally started with a small stand but again, I soon outgrew it so another was made, but this time it was an XL version! I had so many comments on it via my FaceBook and instagram (@keeleyjadex) that he has started selling them on eBay so if anyone is interested in purchasing one, he charges £8.99 for a smaller stand which holds up to 39 bottles. The larger stand is £14.50 + £6.50 postage and can hold up to 60 bottles! You can buy through eBay. Click here for the smaller stand and here for the larger stand! If you don't have eBay but are interested in buying one then drop me an email on talesofnails@hotmail.com.


I keep pestering him for another as my addiction to polish means I run out of room quickly!

What do you think? Like it?!
xoxo

Hand and Nail Care

I suffer from really dry hands and hang nails (boo!) so I'm always on the look out for new products to help combat this!

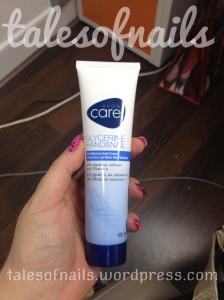
My latest try is Avon Care Glycerine Hand & Nail.


It's a thick texture unlike normal moisturiser. I'm mainly using it to try to help with my hangnails and the god awful dry bits around my nails! So far, it's making my hand super soft and from what I can tell, is helping my nails and cuticules to look and feel less dry. So far, so good! It's a thumbs up from me.

This product is unfortuantely no longer available on the Avon website, but there is a fab alternative which is in the sale for only £1.75!

How do you deal with dry hands/nails? Can you recommend any products for me to try?
xoxo

Water Marbling

I've been watching this new craze of Water Marbling unfold and finally had an evening free to give it a go!

Water Marbling basically does what it says on the tin! You use different nail varnish in water to create a marble effect on your nails. Now it's unique because you will never get one nail looking the same as the others which I personally love!

So, to water marble, you will need the following;
1. Time - it takes a while so make sure you have a good few hours spare
2. Patience - it's frustrating because it doesn't always go right so make sure you give it a few attempts before you even think about giving up!
3. A selection of nail polish - I found higher quality polish worked better
4. An old bowl or cup
5. Cocktail sticks, and lots of them
6. Scotch tape
7. Nail varnish remover and pads

So firstly you will need to paint your nails white. Apply one thin coat, let it dry then apply another thin coat. I done this as sometimes the marbling can come out quite thin so it gives it a bit more opacity. I used Ultra Pro (from Sallys) in French White but any white polish is fine!


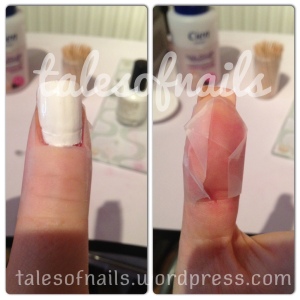
Once that's dry, use your scotch tape to border the outside of the nail being careful not to cover any of the nail. This will keep the rest of your fingers from getting covered in polish! Go along the side of your nail, around the back and back down the other side. Then use another piece across the bottom of your nail.


You can now start your mixing! Fill your cup/bowl with ROOM TEMPERATURE water. This is important as if it's too hot/cold, then the polish won't spread like it should. With your first colour, apply a drop of the polish in to the centre of the bowl. This should go all watery and spread out quite a lot. Then take your second colour and do the same in the middle of the first colour. Continue to do this with as many colours as you like. I used three so once I'd gone through the cycle once, I started again with the first colour until I felt I had enough rings.


I originally decided (from left to right) on Avon Nailwear Pro in Creamsicle, Models Own in Dream Stream, Rimmel Pro in Urban Princess , Models Own in Jade Stone and Rimmel Lasting Finish in Sunshine. Some of these didn't really work how I wanted so I also used (but didn't photograph) China Glaze in Stella, China Glaze in Midtown Magic, Avon Nailwear in Aqua Fantasy, Barry M in Cyan Blue and Barry M in Pink Flamingo. The ones I didn't photograph actually worked the best!

It should look something like..


You will now need to take a cocktail stick and carefully draw a pattern in the polish that you like. Be creative! This nail art isn't meant to look perfect so if you mess up a bit..who cares?! No one is going to know! Piece of advice - the edge of the 'blob' will now be quite dry so if you get too close to the edge, you will pick the whole of the patch up on your stick. Try to swirl it from the middle!

Once you've got a pattern you're happy with, you literally put your nail in to the water face down and hold it under the water for about 10 seconds. This will help it to dry. After 10 seconds, take your cocktail stick and swirl around the excess polish. It should lift all the extra away from your nail. Carefully lift your nail out of the water and admire your work of art! I actually ran out of time so couldn't do a full set but here's what I did do..


Don't mind the mess - I didn't clean up round the nail because I was so excited to photograph! All you'd need to do is run a pad around the nail with some nail varnish remover!

Like I said, it is a time consuming task but a fun one! And it does create a bit of mess..


For an excellent YouTube tutorial, click here! Shows all the above in a video, just incase I didn't explain anything too well!

Have you tried water marbling? If so, how did you find it and do you have tips for the next time I try?
xoxo

Nominated for Beautiful Blogger Award!

So tonight I got a lovely message from the talented Naomi at Bewitchery letting me know she's nominated my blog for the Beautiful Blogger Award! I'm so flattered that she considers my blog one to follow! Bewitchery is a blog about all things beauty, reviews and lifestyle in general! I'd recommend you head on over and check it out!

Right, so this is my first nomination so forgive me if I get it wrong!


There are three rules for this award, which are…
•Post seven interesting things about myself.
•Nominate other bloggers who I feel deserve the award.
•Let them know about nomination.

Seven (not so) interesting facts about me..Right, well here goes..

1. I love the colour PINK (did you already guess..? haha).
2. I'm training to become a Nail Technician. This is done in my spare time. I must admit, due to my holiday coming up (19 days, yay!) I have been slacking, but as soon as I'm home, I'll get back on it and qualify in no time!
3. I don't really watch much TV but when I do it's either stuff to fry your brain like Jersey Shore (don't act like you don't love it!) or documentaries! I LOVE me a documentary!!
4. My DVD collection is one to rival Blockbuster. I probably have over 250 DVD's but still can't help myself to buy more. It's almost as bad as my nail addiction. When you add it to my boyfriends collection...well, let's just say we'll need a whole room for DVD's in our house!
5. I want to be reincarnated as a shark. I'm not overly fussed what shark, although I'd pick a hammer-head if I'm given the choice! I think sharks are so beautiful and majestic! I know they're also killers, but what can you expect in their territory?! 'Shark infested waters'..What, so does that mean your home is 'Human infested'?
6. When I was in school, I represented England in the 100 metres. I kick myself everyday that I gave it up but what can you do? It was fun while it lasted although I could barely stomach the nerves in front of a small crowd, let alone at a higher level!
7. I have 6 tattoos. All tasteful! I have one behind my ear, one at the nap of my neck, one of my outer wrist, one of my lower back, one on my hip and one on my foot! I think tattoos are (mostly) beautiful. Much like how I express things through nail art, I think it's nice to have something on me that means something to me!

Now I know I'm supposed to nominate another blogs but I've only been set up 48 hours so I haven't really spent much time looking through many others, but if I could bat this back to Bewitchery, I totally would! So for now, I'm not going to pass it on, but I will revisit this in the future and nominate those who deserve it!

Hope you enjoyed the read.
xoxo

Friday, 10 August 2012

OK I Lied..

..Just one more archive post. I found a few on my phone that are actually too pretty to not include. Plus I figured out a nicer way to watermark my pictures so wanted to show that off too haha.

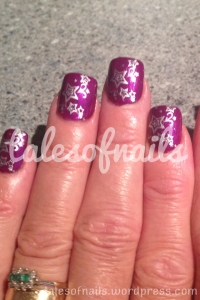
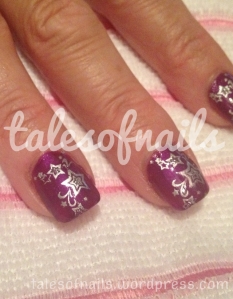
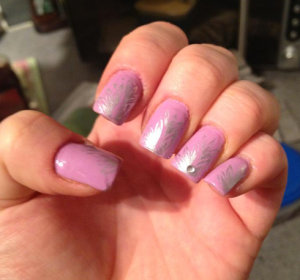
First up, acrylic done by moi (thanks for letting me practice on you, Mum!) Base colour used is Barry M Bright Purple with (surprise, surprise) Barry M Silver Foil as the stamp polish (I just love it!) and then a bit of unnamed silver glitter within the stars. Stars are on a Bundle Monster plate..


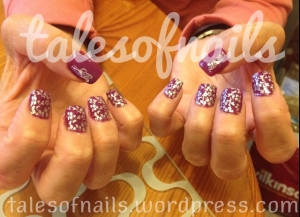
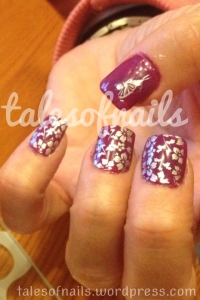
Next up (thanks to my Mum for being my guinea pig..again!). Barry M Bright Purple (her fav!) with Barry M Silver Foil and a Bundle Monster plate..


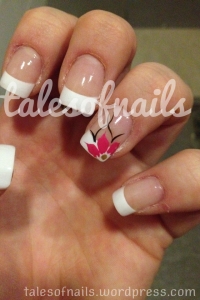
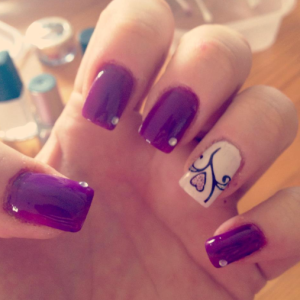
And finally is just my au natural (well..natural style, nails are false!) design. Typical french manicure with a cute little flower design because I can't do plain!


I just can't do white tips for very long! It lasts a week at a push before I can't fight the urge to paint them! Don't know how I will manage on holiday as my boyfriend has told me I have to do the same design as above and keep it for the WHOLE 2 weeks..ermmm.. Think I might have to sneak some polish in my hand luggage and paint them in secret!
xoxo

The Brighter, the Better!

OK so I think i have posted enough of my old pictures, after this post they will be live, up to date photos with step by steps! Yay me.
Anyway, my last archive post is quite a plain and simple one. It is Barry M Neon Pink with Barry M Hexagon glitter.


Now I LOVE this polish just because of how bright it is - the picture doesn't really do it justice so I'll have to swatch it again another time..!
Although, with neon colours I found them so watery meaning you need loads of coats and I'm far to impatient for that so I tend to first do a layer of white polish, let that dry and then apply the neon colour. I only need two coats max and it is a bright as you'll get it!!  Give it a go - it makes a massive difference! :)
xoxo

Thursday, 9 August 2012

Countdown...

So I'm on the home stretch of my, what seems like, never ending countdown!

We booked our holiday in January and have been countdown ever since so I'm so excited that we're FINALLY at 20 days!!! We're off to Orlando for 7 nights, then on a cruise to the Bahamas for 3 nights and then back to Orlando for another 5 nights. Excited is an understatement!!

20120809-104127 PM.jpg

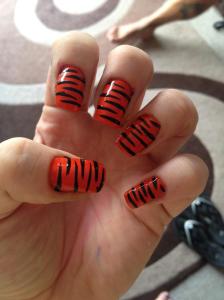
Boing Boing..Tigger!

I knew I wanted something bright but couldn't decide on what to do. So I went for OPI Roll in the Hague which is a lush popping orange. I then decided to handpaint on some tiger stripes, and all of a sudden, they were Tigger nails!!


I bloody lovely this design! I normally mess up my right hand (as I'm right handed) but I was so surprised at how neatly I managed to do both hands. Anyway, who's ever seen perfect stripes on a tiger?! (or a tiger at all actually...!). To get this you will need a striping brush which you can get on eBay! I got mine in a set of brushes for under £5.
xoxo

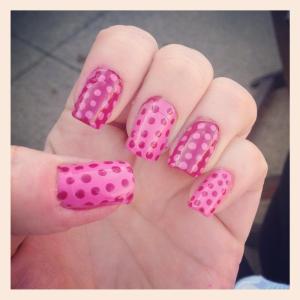
Pinky Polka Dot

So I startedwith just pink, then pink with white polka dots and accent finger, then every other nail reversed polish which I decided on..


I love this design - so simple but effective! Ignore my god awful acrylic nails growing out! I'm off on holiday in just over 2 weeks so I'm trying as hard as I can to wait until the day before to get a new set but it's killing me! My nails just seem to dry out so quick - anyone got a remedy for hang nails?! Mine RUIN my photos - boo!!!
xoxo

I'm a Glittery Leopard

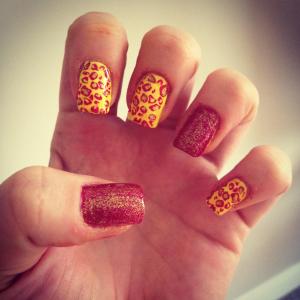
So I got a new Rimmel yellow polish in the sale for £2 and with it being Summer, I really fancied using it! I kinda have to think of a design for my thumb because my stamps aren't wide enough to cover the whole nail so it always looks a bit tacky so voila! Instead we shall we a glittery leopard..


I used a gold glitter that came in a Frontcover set on the thumb and ring finger and then used a cocktail stick to dot glitter in and around the leopard spots!

xoxo

Essie.. I'm in LOVE!

So in an earlier post I spoke about Essie Shine of The Times. Now I wanted this polish for a while and finally managed to nab myself a bottle and all I can say is it was worth the wait!!!! I instantly fell in love. It takes a regular boring mani to something magical!


You can see where the light catches the nails what it does. You get a whole spectrum of colours dancing across your nails! And what's better is if you put it over different colours then it looks different everytime! It picks up off the base colour. It really is gorgeous so I suggest you get some ASAP! xoxo


Pink AND Bows..What More Could You Want?

I felt kinda plain so just deicded to go for a Rimmel baby pink polish but using Essie Shine of The Times over it to give it a little somethin' somethin'! (Essie post to follow...!). I'd also just brought a load of 3D glittery bows off eBay so decided to try them out.


Sorry - picture quality is a bit rubbish! I think I'll start using my camera instead of my iPhone! Anyway, I wasn't too sure if I liked these or not! I think having a massive 3D bow was a bit strange but they did grow on me, except when I caught the bow in my leggings...yeah, OUCH! I think they look super cute but I would only do these again for an occasion. I held them in place with a small ball of acrylic underneath which also made taking the bow off really easy!

Have you have any 3D nail art? How did you find it?
xoxo
Sallys is My Kinda Heaven!

So a trip to Sallys meant new polish so I had a few painting sessions with my new goodies..!

First up, OPI Roll in The Hague..


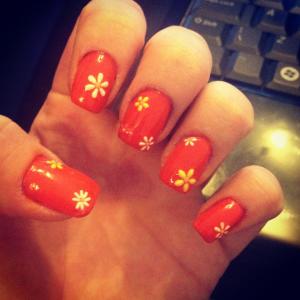
The orange was such a lovely bright colour and I thought the flower nailart stickers just set it off nicely! These caught a lot of peoples eye (I wonder why..!) and got a fair few compliments!

Next, my bargain of the day was my China Glaze Mid Town Magic which I got in the sale for £2.30!!! It's a gorgeous black with loads of glittery accents. It's so beautiful especially when you catch it in the light!


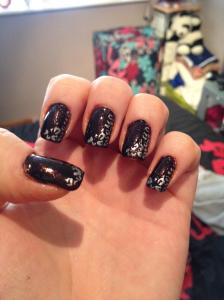
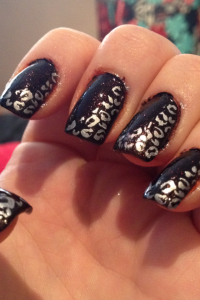
The photo doesn't catch how lovely the polish is - I think I need to swatch this one on it's own! Anyway, Barry M silver foil (shock!) used with my Bundle Monster stamp - just used half the leopard stamp instead to get something new! :)

I got about 4 other polishes from Sallys that I've not yet used so will swatch them soon and post them up! :)

Do you have a Sallys near you? What's been your best bargain?!
xoxo
Kisses..

Slightly bored of all the usual things I do so tried using one stamp several times on one nail.. At first I didn't like the result but had no time to redo them so I was stuck with them! But they grew on me and I think I'd do it again but try different colours.. Using Barry M Pink Flamingo with Barry M Silver Foil to stamp! I must always use the foil - it stamps so nice!!!


What stamping techniques do you use?
xoxo
It was an incey wincey tiney winey..

not so yellow Polka dot nailart!

So as the weathers been sad and depressing, I decided to bring some summer to my nails.

Using a mixture of Barry M, Models Own, Avon & E.L.F, I created this..


Simple design! dots created using my trusty dotting tool!
Are you a fan of polka dots?
xoxo
Happy Jubilee!

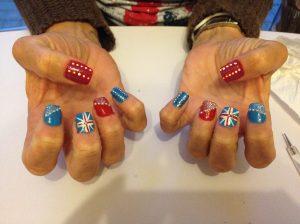
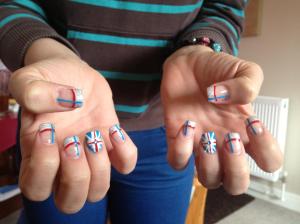
For the Queens Diamond Jubilee, it was only fitting to do some nail designs to celebrate the day!

I started off my doing my own nails - using a mixture of Barry M, Models Own and E.L.F.


Ignore those hands - nail art can get messy!

Then my Mum asked me to do her a set of acrylics with a Jubilee design, so had to think up another design..


This was only my second set of acrylics EVER since I started training so I was really happy with them!

And then my cousin decided she wanted something too, but less colourful - thinking cap on..!


I was really happy with all three designs! Even my Dad joied in the pampering and had a Union Jack on his big toe nail (except he didn't let anyone get any photographic evidence!).

What did you do for the Jubilee - did you do any nail designs to match the theme?
xoxo

Nail Tattoo..what?!

So I read somewhere about someone using temporary kids tattoos on their nails..so of course I went on to eBay and found some designs I liked and eagerly awaited them to be delivered!

Well they came so I had to have a go! I used Barry M Bright Purple and some E.L.F in White on the ring finger. You need to make sure the polish you're applying the design over is completely dry otherwise you'll get some dragging!

If you'd like a step by step guide, then comment and let me know and I'll create one for you all :)


I absolutely love the result! It looks so different to anything I've done before. Word of warning - if you're doing this for a special occasion, do it as close to the day as possible. As with fake tattoos on skin, when they get wet it does start to peel away even with a top coat.

Have you ever thought about using temporary tattoos on your nails..?
xoxo

I'm a Rockstar!

Rockstar nails are a massive hype at the moment and a design that I love design because it's so quick and simple, yet looks lovely!

For this design, I used Barry M Pink Flamingo as my main colour, with Barry M Silver Cascade on my ring finger to give it that Rockstar bling look!


So pretty :)
Have you tried out Rockstar nails? What colours did you find worked well together?
xoxo

What An Angel..

I very rarely just paint my nails one colour - I love to be able to express my feelings and what not through my nails but sometimes I just don't have the time to do intricate drawings on all 10 nails so I decided to go for Barry M Berry Ice cream with Barry M Silver Foil as my stamping polish! I used one of my Bundle Monster plates but halved the design to get an almost angelic angel wing look! I then applied a gem to my accent finger.


I really liked this design and it's one I'd revisit in the future!

Have you tried any Barry M polishes? I love their varnish - easy on the purse but not lacking in quality what so ever!
xoxo

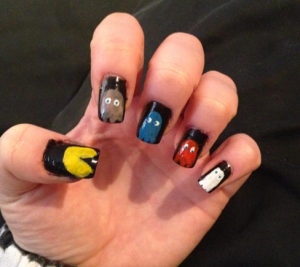
Pac Man is Back

Bored one afternoon, I decided to try something different! Anyone fancy of games...PacMan maybe..? :)


I have to say this was just a play around so maybe isn't as neat as hoped but still pretty cool!
xoxo

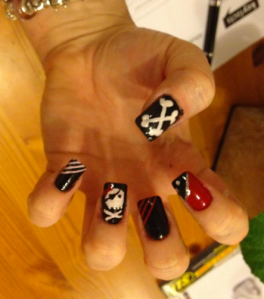
Ahoy there!

So me and my friends are known for fancy dress parties at any given opportunity! The most recently was a pirate party! So of course my nails were just as important as my outfit!


These went down so well which meant a queue of friends at the door wanting theirs done...not that I mind! :)

Do you try to match your nails to your outfits?
xoxo